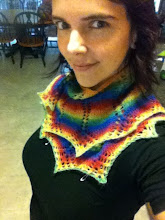
I have finally posted some wares on Etsy! Things got hectic with the new house, then the hubby's new schedule at work, then the holidays... but I finally managed to devote some time to stocking my shop! Here are some pictures of what is available right now!
As always, Customs are more than welcome!! Drop me a line if you are looking for something that isn't in stock right now!
Showing posts with label yarn. Show all posts
Friday, February 8, 2013
Friday, August 5, 2011
A new pattern!!
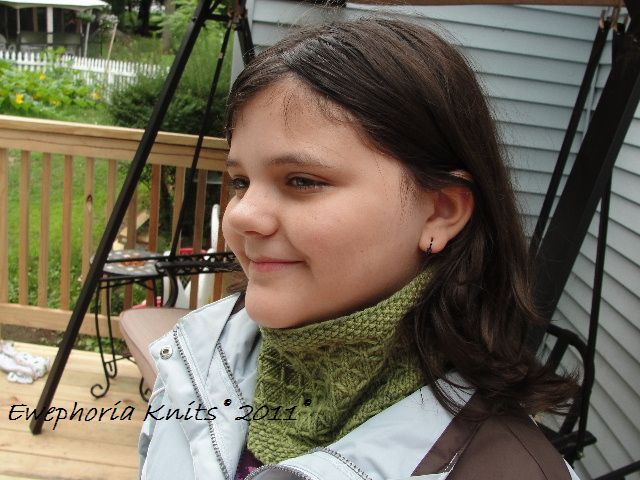
I came up with a new pattern! It's a fun and functional cowl. It will keep your neck and face warm in the coming winter, you can even pull it up over your head for a makeshift hat!
Many thanks to my little mini-me for modeling winter gear in August!
So, here is the pattern... it has not been tested so if you find any mistakes please let me know!! I would love to see anything you make from this pattern!!!
Many thanks to my little mini-me for modeling winter gear in August!
So, here is the pattern... it has not been tested so if you find any mistakes please let me know!! I would love to see anything you make from this pattern!!!
Lattice Cowl
4oz Worsted weight yarn
6 16” circular needle
8 16” circular needle
use whatever needle you need to get gauge. I get 5spi on 8's.
Cast on 103 stitches on smaller needle (a little loosely, remember, this needs to go over your head!), pm and join in the round. Work in seed stitch for 1.5 inches. Work last stitch of seed stitch pattern as k2tog or p2tog, keeping in the pattern, 102 stitches remain. Switch to larger needle.
Row 1: knit around
Row 2:sl5 keeping working yarn in front, k1. Repeat around
Row 3: knit around
Row 4: k2 *pick up float on right needle, lift up and knit the next stitch, allowing float to go behind worked stitch, k5. Repeat from * around to the last 3 stitches, k3.
Row 5: knit around
Row 6: k3, *sl5 keeping working yarn in front, k1. Repeat from * around to the last 3 stitches. sl3 keeping the working yarn in front.
Row 7: Sl2 keeping the working yarn in front, knit around.
Row 8: k5, *pick up float on right needle, lift up and knit the next stitch, allowing float to go behind worked stitch, k5. Repeat from * around.
Continue working rows 1-8 of the pattern until the piece measures 6 inches or longer if you prefer. Make sure you end of row 4 or 8 of the pattern.
Switch back to smaller needles. Kfb, then k1p1 around, end in k1, 103 stitches. Continue in seed stitch for 1.5 inches.
Bind off using a stretchy bind off. I prefer a sewn bind off. A great tutorial can be found here
Here's a wonderful tutorial for the lattice stitch:
Remember, this is only a cowl and feel free to play with the pattern! This would look great with a ribbed border edge instead of seed stitch, or you could even try garter stitch or just knit plain for a couple inches for a rolled edge.
Tuesday, March 9, 2010
Waiting on Purewool!
I am (not) so patiently waiting for a delivery of 19 skeins of Purewool! This was a co-op order, and i placed the order so long ago that i have since forgotten what i ordered! It will be like Christmas morning all over again when it arrives.
Add that to some yummy yarns i have been scoring here and there, and you have the makings of a spring and summer full of to-die-for shorties!
Be on the look out for some stash pictures coming soon!
Add that to some yummy yarns i have been scoring here and there, and you have the makings of a spring and summer full of to-die-for shorties!
Be on the look out for some stash pictures coming soon!
Alice Mitts pattern
As seen in The Twilight Saga: New Moon...
Check out the adorable fingerless mitts that Alice is wearing... her version is done in bulky yarn, but here is my version done in worstedThese are super easy and very fast to knit up. This is my first ever pattern, so if you notice any boo-boos, please let me know! The pattern is soooo very basic, feel free to experiment with it!
I used worsted and a size 7 11' circular. You can do magic loop, two circs or DPNs as you would like!
Cast on in multiples of 6... 30, 36, or 42 stitches.
place a marker and join in a round
Work 15 rounds of 3x3 rib.
Work 20 rounds of stockinette
Starting on stitch one, turn and purl back to the last stitch before the marker.
Turn and knit back to the first stitch.
Work back and forth knitting one row and purling the next for 10 or so more rows, ending with a purl row (make sure you slip the first stitch in each row for a neater look.)
Join back in the round (i k2tog to get a tighter join... if you do this you will need to increase one stitch anywhere in the next round.)
knit one or two rounds.
Work 12 rows of 3x3 rib
BO in 3x3 rib
Happy knitting!!!
Subscribe to:
Posts (Atom)